I gave up, but my ppf guy recommended wrapping them. It required painting around the sides of the reflectors and iirc they maybe used some tape to ensure no light leaks through. Im quite satisfied with the results.
Oracle used to make what they called a "Ghosted" LED side-markers for various models that matched the color of the car. I had a set of front and rear markers in mosaic black metallic on my ZL1. Not sure if they still make them.
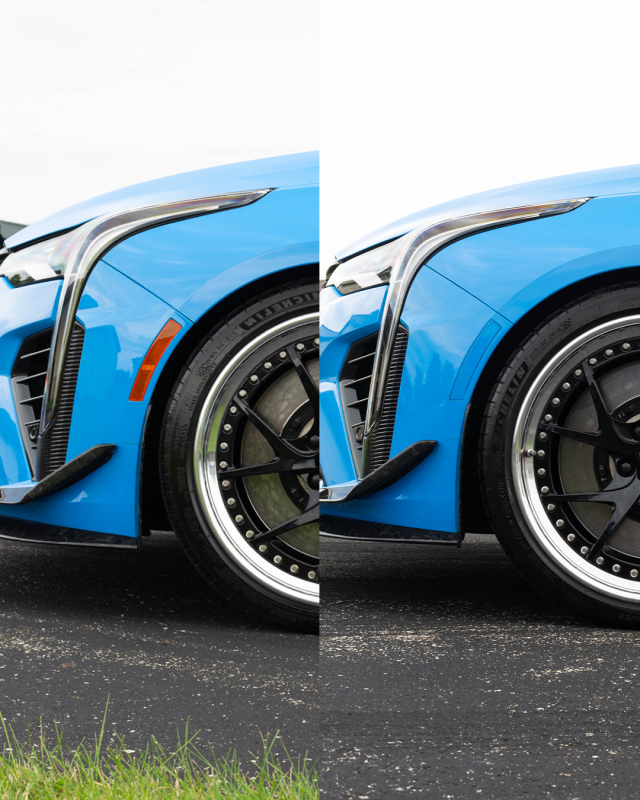
Your Cadillac deserves to look its best while performing at its best. That’s why Tapout Tuning is proud to offer painted front reflectors! While the factory orange reflectors do their job, they stand out and disrupt the flow of the design. When you have painted front reflectors on your Cadillac...
Your Cadillac deserves to look its best while performing at its best. That’s why Tapout Tuning is proud to offer painted front reflectors! While the factory orange reflectors do their job, they stand out and disrupt the flow of the design. When you have painted front reflectors on your Cadillac...
I also got the Savage side markers (clear that blinks orange).
Once I figured out that the little red clip needs to go all the way back (not halfway, where it -clicked-), the replacement was a piece of cake. Plug and play.
This site uses cookies to help personalise content, tailor your experience and to keep you logged in if you register.
By continuing to use this site, you are consenting to our use of cookies.