BWDudeBro
Seasoned Member
How'd the install go? Any fitment issues?
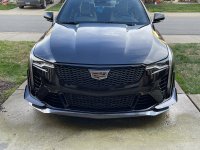
I didn't mind removing the bumper as I was replacing corner lights, badge, and adding their CF Splitter as well. However, I currently can't remount the bumper as the dive planes simply do not fit. Description and pics below. Tapout seem like awesome people but for the price I was really hoping these would mount up securely. I've sent them a note with pics but wanted to check if anyone else experienced this first.
Pic 1: broken tabs, Pic 2 and 3, not enough length.
Driver's side: One tab broke clean off, and i'm not kidding here, because of the incredibly slight sideways pressure exerted on it from picking it up off the carpet. As in, zero real pressure. I know how that sounds but you'll just have to trust me. "Ok," I think to myself, "let's see if it'll mount securely with 4 out of 5 tabs." A second tab broke by simply trying to fit the part to the bumper. Again, you'll have to believe me that I wasn't gorilla-arming this stuff. I've saved for this car for a long time, I'm trying very hard to keep it un-janky. A third tab cracked in two places but didn't totally break while trying to align everything. Even if I had gotten the tabs through with no breakage, they simply aren't long enough to accept a clip on the other side.
Passenger side: Luckily no broken tabs, but same issue as other one - tabs just aren't long enough to accept a clip on the other side.
The amount of material removed from each tab by Dremel seems to tell the whole story - they simply have to fit very well in a bunch of different dimensions: Thickness, vertical and horizontal positioning, and length. It looks like the mold didn't allow for this so removing tab thickness and width was the compromise to try and get them to slot in.
As an aside, these pieces were the key to a few decisions - when I had to get my non-CF bumper replaced, I intentionaly spec'd the CF bumper to accept these... so I drove around with the mounting holes in my bumper for a few months til these got ordered and mounted. Looking back, I wouldn't have done that and happily ran the non-CF bumper and probably just added the splitter and deflectors. (The CF Splitter seems to mount up OK and should be fine upon reinstall of bumper.)