

Summary
Bottom line: GearWrench’s small brake bleeder is a must have tool for the V-Net’s DIY shop.
Best DIY Brake Bleeder
by Hib Halverson
I’ve owned my ATS-V for two and a half years and almost 22,000 miles so, this week, it was time to flush the brakes. For over 20 years, when I’ve done brake work in my little DIY shop, I’ve used a small, hand-pumped, pressure bleeder, but recently, it malfunctioned so I replaced it.
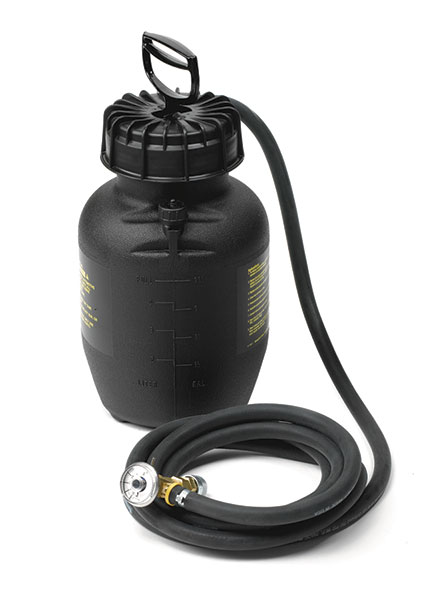
The one I selected is from GearWrench (PN 2901D).This bleeder holds about a gallon of brake fluid, comes with a six-foot hose which on one end, has pressure gauge, a fluid shut-off valve and a quick-disconnect coupler. The tank has a pressure vent valve on the top next to the filler cap.
The fist step in using this tool is to install a brake bleeder adapter in place of the the master cylinder cap. Some of these are available from GrearWrench. If you use an adapter not made by GearWrench, such as the Kent-Moore J-35589A we use on our ATS-Vs, you have to install an automotive (also known as a Truflate, Type T, or C-style) air line coupler to the adapter. The GearWrench bleeder’s quick disconnect goes onto the coupler on the adapter.
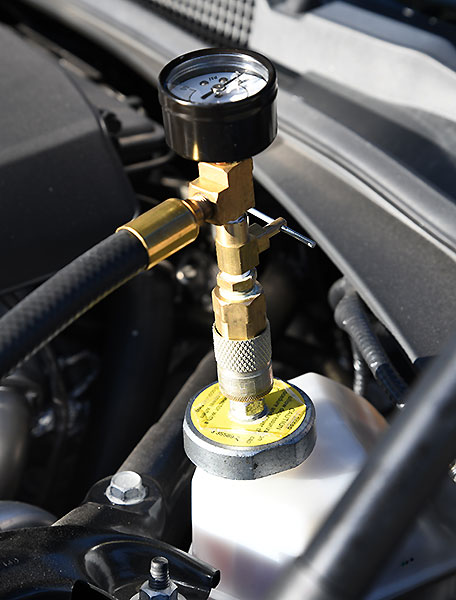
Filling the GearWrench pressure bleeder is as simple as unscrewing the top and pouring in several pints of brake fluid, in our case Red Line “RL-600”. Several strokes of the GearWrench pressure bleeder’s pump has it pressurized to 25-30-psi, the Service Manual’s recommended pressure for bleeding. Pumping it up requires no more effort than pumping up a bike tire. Next, you open the valve at the end of the bleeder hose.
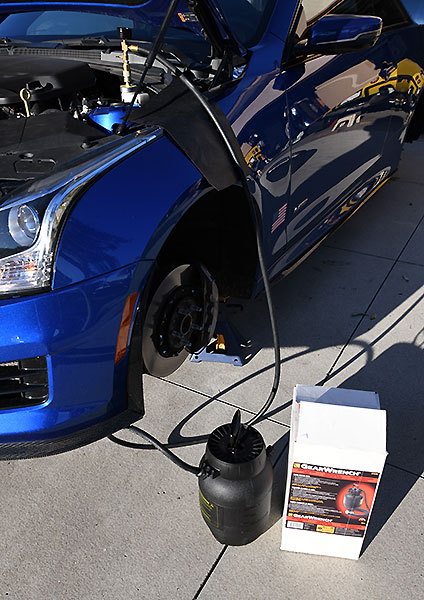
To flush the brakes on an ATS-V, you start at the right rear brake caliper. Since these are Brembo fixed-caliper brakes, each brake has two bleed fittings and you must bleed each of them individually. Remove the fitting caps then do the inner-most fitting first then the outer. When you open the fitting, the fluid will start coming out a medium brown color. After you close the fitting, replace the rubber fitting cap. I bleed each fitting until the fluid turns light yellow, indicative of fresh fluid. Then do the left front, left-rear and finally the right-front.
My new GearWrench brake bleeder works very well and is perfect for we DIY folks who are not bleeding brakes for a living and, thus, do not need a large, commercial-grade pressure bleeder. One feature the GearWrench bleeder has which my old one did not is the vent valve. I store the bleeder unpressurized. With my old bleeder, once I was done with it, I had to unscrew the top to release the pressure. It was always a challenge to unscrew the top slowly so the pressure would not release explosively. The GearWrench’s vent valve makes venting pressure in the bleeder much easier.
Bottom line: GearWrench’s small brake bleeder is a must have tool for the V-Net’s DIY shop.
For more information, see the GearWrench web site.