by Hib Halverson
All the V-Series Cadillacs, including the V-Net’s ATS-V “project” have plastic headlights. We’ve all seen older V’s and non-V’s, with yellowed or hazed-over headlight lenses. The V-Net has a solution to that problem.
I have owned cars and trucks with plastic headlight assemblies since the late-80s. To every one of them, I have applied polyurethane headlight protection film (HPF). As a result, I’ve never had a plastic light turn yellow, get rough or hazy. The oldest vehicle I own with plastic headlamps is a 1999 Chevy Blazer. Because I have urethane film on its headlight lenses, its lights look almost new. Same with my ’02 Camaro–it’s got HPF and the light lenses are neither yellow or hazy.
Headlight Protection Film, besides offering protection from yellowing and hazing, also, protects the light from small impacts of sand, gravel and small stones because the film has an impact-absorbing quality.
With our ATS-V–any ATS for that matter–headlights list for $1295.00 and are street-priced at $870, and that’s just for the standard light, the up-level, HID unit costs even more. Either way, the price of plastic headlight assemblies is obscene. Anything a DIY Cadillac enthusiast can do to prolong the light’s life at modest cost makes a hell of a lot of sense.
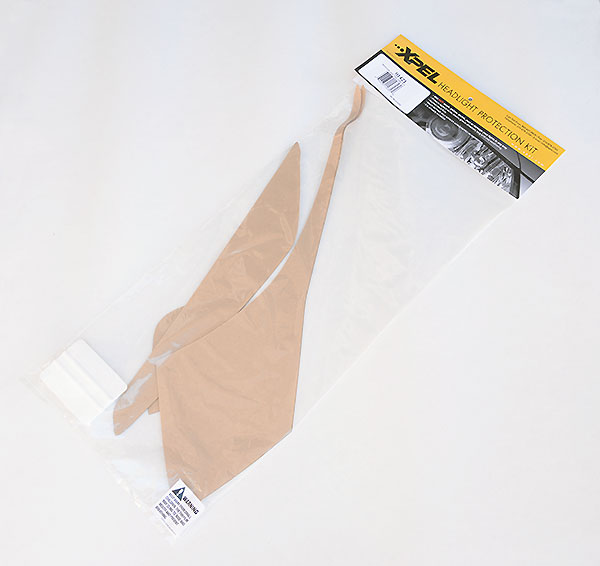
After taking delivery of the “BMW Buster”, we had Transhine Auto Detailing install Xpel Ultimate Paint Protection film. Next, I ordered an Xpel Headlight Protection kit (PN H1421) and installed it. The kit costs 70 bucks–pretty cheap insurance for a $1300 headlight.
Unlike paint protection film, installing headlight film can be a DIY activity as long as you have the right tools and you understand how to do it properly. Yes, it’s a bit time consuming and tedious, but if you are careful and use the right installation techniques, when you are done; the headlights will be protected from yellowing, hazing, chipping and sandblasting and, unless you look really close, you cannot tell that the lights have Xpel HPF on them.
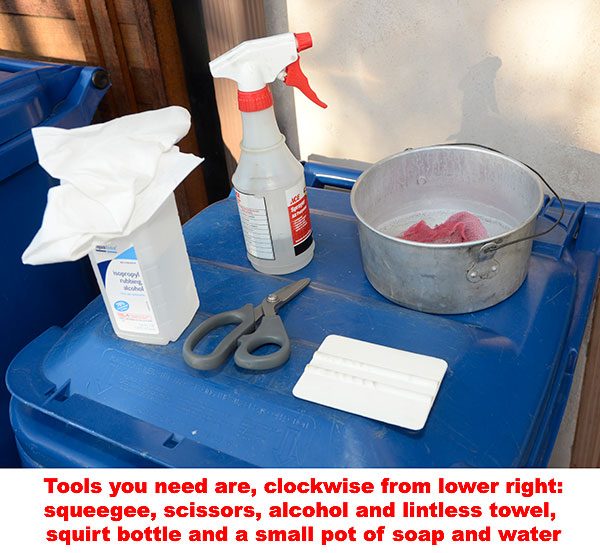
First, make sure the light assemblies are clean and, we mean: squeaky clean. We used Dawn dish detergent and a Standard Abrasives White Cleaning Hand Pad to scrub the lens, which removed any dirt, road grease and water spots. Next, we wiped the lens down with denatured alcohol on a lintless paper towel we got out of the photo lab.
Xpel currently does not offer a Headlight Protection Kit specifically for ATS-Vs. What you get is for an ATS, which includes film for fog lamps which you don’t need, because, on a V, the fog lamps are replaced by the radiators for the engine’s charge air cooler. Hopefully, Xpel will release an ATS-V kit and reduce the price because of reduction in materials used.
The HPF for each headlight is made-up of two parts: one section of Xpel for the top of the light and a second section for the front and side of the light. Both sections are specific to a side of the car.
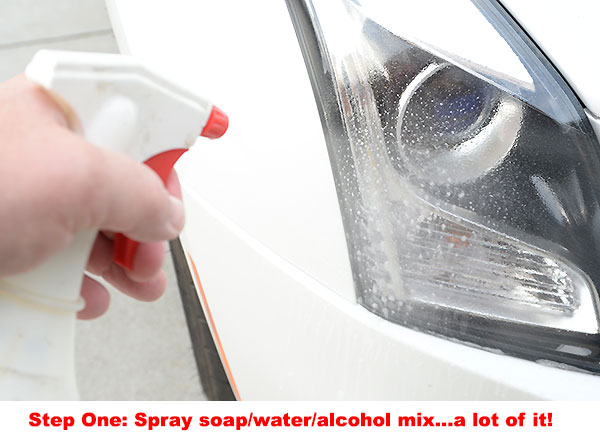
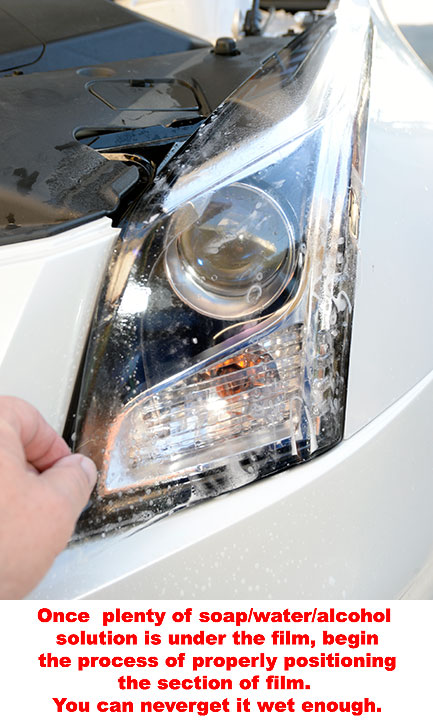
Mix up a drop or two of Dawn dish soap, water and 25% denatured alcohol in a one-pint spray bottle. Spray the headlight lens generously. Pick a light, then select the appropriate section of Xpel for the light’s top, peel off its backing and soak the adhesive side with soap/water/alcohol mix. Set the section of HPF on the top of the light and line up the edges parallel with, but slightly offset from the edges of the light. The Xpel is just slightly smaller, so, at the edges of the light, there will be a very narrow part of uncovered plastic. At the front of the light, you want the edge of the Xpel right at, but not around, the 90° angle formed by the top and the front of the light. For now, keep the underside of the Xpel wet with soap/water/alcohol solution.
Next, wet the front of the lens, again. Peel the section of Xpel HPF which covers the front off the backing and wet the sticky side with your soap/water/alcohol mix. Apply that part of the film to the front of the light.
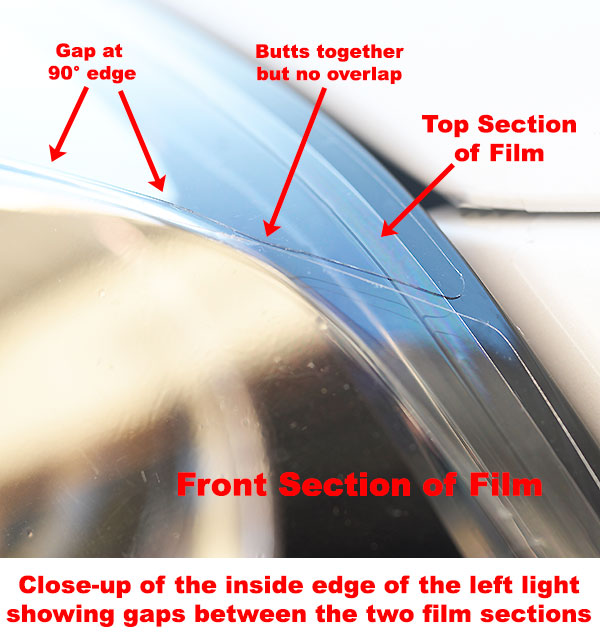
Now, the job gets a little tedious. You have to make sure the two pieces of HPF almost touch each other right at the 90° edge that runs along the top of the front of the light. Also, make sure the other three edges of each piece have about the same offset from the light’s edges.
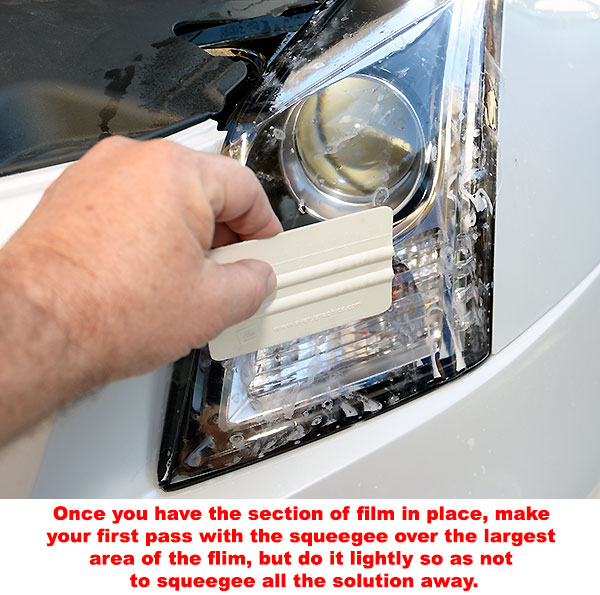
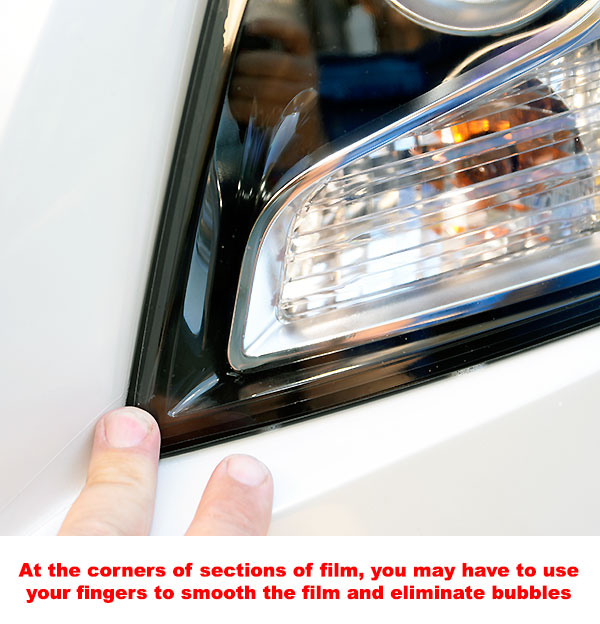
Key to this “lining-up” process is keeping the underside of the HPF at least damp until you’ve got both sections of film in the right spots. Once you have that, then take the squeegee which comes with the Xpel Kit and start forcing all the air bubbles and excess soap/water/alcohol mix out from under the film and, again, begin this process with the top section. Work from the approximate center of the top section of film outwards. The corners are hardest to get to stick. Once you have most of the fluid squeegeed out, switch to the other section of film on the front and side of the light.
The second section of HPF has one end where the width of the film is quite narrow, so it’s easy to stretch to the point of deforming the film. We had that happen on both sides. The very “tail” of the front and side section of film which extends to the rearmost part of the side of the light ended-up too long. As a result of the film stretching, we had cut about 3/16 of an inch off the end which had stretched so far to be on the painted part of the fender.
There are a couple of places on each light assembly where the two pieces of film will butt together on a flat surface. Make sure they do not overlap. You want them only to have edges touching.
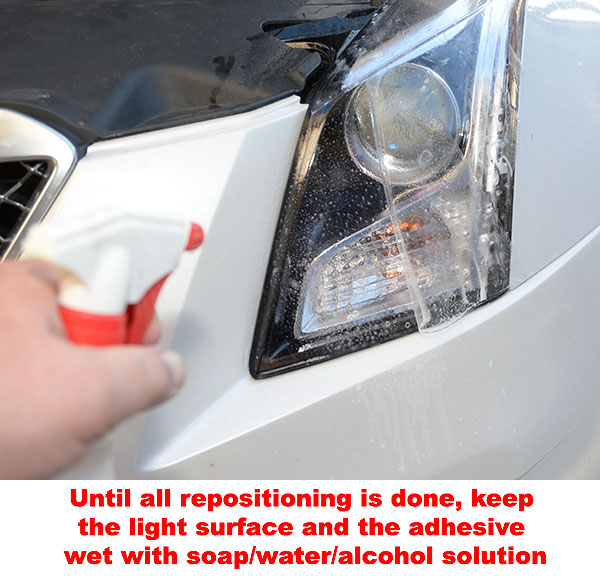
What do you do if you’ve squeegeed out most of the soap/water/alcohol solution and you have to reposition one or both parts of film? As long as there is still some moisture under the film, you can lift an edge and pull the section of film up enough to spray more solution underneath. You can even remove the film all together, respray, then do your repositioning.
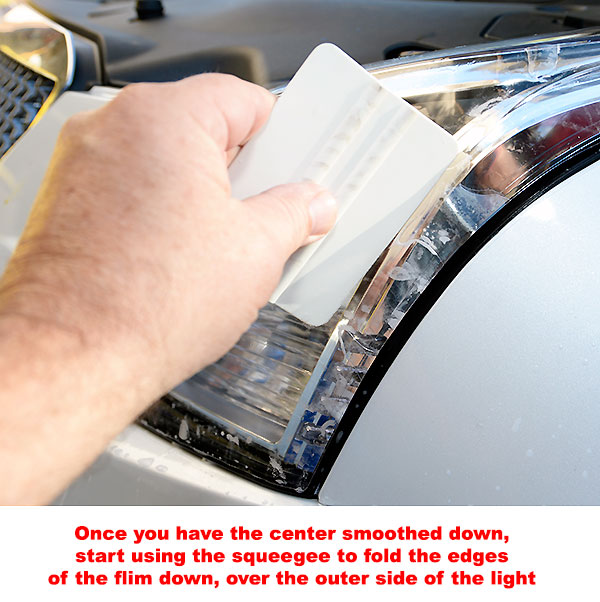
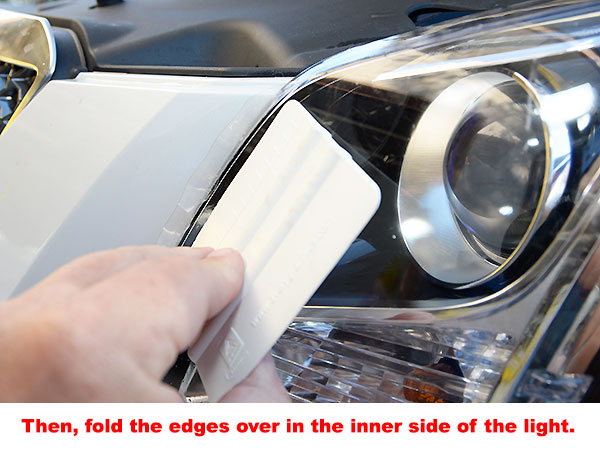
Once you have the positioning correct and have squeegeed out most of the liquid, then go back and squeegee the larger parts of the film sections again. Finally–and you may need a magnifier for this–carefully inspect all the edges of each section of HPF looking for air pockets or edges which have not been carefully pressed into place.
Let the car sit over night and the remaining soapy water/alcohol solution will have evaporated, the film’s adhesive will have cured and, if you properly installed the film, you will not see it unless you look very close.
While the installation takes a bit of work, we recommend Xpel Headlight Protection Kits for V-Series and all Cadillacs.
For more information, go to Xpel’s web site at http://www.xpel.com/products/headlight_protection.asp